


No products in the cart.
Payment methods accepted
Unsure what Ethernet cable you need?
Look no further than our Ethernet Cable Finder. Answer a couple of questions and let trueBOT guide you to the perfect cable for any situation.
Still have questions? Check out our in-depth blogs, insightful white papers, and instructional videos on all things Ethernet cable and low voltage supplies.

Read: The Difference Between Cat6 vs Cat6A Ethernet Cable

Understand: Selecting the Correct Outdoor Ethernet Cable
Time to find coaxial cable and connectors for your install? Well, you are in the right spot!Check out our in-depth blogs, white papers, and instructional videos about everything going on in the low voltage industry and one of the best sources for coaxial information.
Have questions? Our networking experts have the answers!Check out our Cable Academy. for more information.

Read: The Difference Between Dual Shield vs Quad Shield Coaxial Cable
Understand: How To: Universal RG6 Compression F Connector on Quad Shield Coaxial Cable
Fiber Optic expertise at your fingertips.
Looking to deepen your understanding of fiber optic technology? Look no further than trueCABLE's Cable Academy. Our extensive collection of blogs, masterfully crafted by industry experts, offers a wealth of invaluable insights into the world of fiber optic cabling.
Have questions? Our networking experts have the answers.Check out our Cable Academy. for more information.
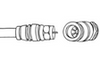
Read: Fiber Optic Splicing: Examining the Factors that Affect Splice Performance

Understand: Using Fiber Optics to Extend Your Ethernet Network Beyond Copper's Limits
Effortless cable management. Learn how we do it.
Low-voltage tools and accessories should keep your networking installations clean and organized. trueCABLE has a variety of high quality cable management tools, accessories and informative blogs for all your installation needs.
Check out our Cable Academy today and expand your knowledge.
Read: How To: Copper Fabric Strips for Bonding Shielded Ethernet Cable

Understand: When Aliens Attack! Avoiding Ethernet Alien Crosstalk

Written by Don Schultz, trueCABLE Senior Technical Advisor, Fluke Networks Copper/Fiber CCTT, BICSI INSTC, INSTF Certified
All your permanent networking cable has been installed. What next? You get to “wire up” the head end of your installation. Essentially, that means the “server” rack. More likely it is a multi-use network rack that was squirreled away somewhere out of sight. That rack (or racks) serves as the consolidation point for your network and can be quite a bit of fun to plan out for your install. That same rack can become the source of frustration and the stuff of nightmares if you plan it all wrong, however!
In this blog, we will cover:
Server racks, from a strict technical point of view, are designed to house computers that are dedicated to serving out data and the associated uninterruptible power supplies (UPS) to keep them running in the event of power failure. Often server racks are deep and are 23” wide, although 19” wide racks are common as well. Which width of rack you will use depends on the equipment that is installed.
Network racks are designed to house switches, routers, patch panels, and other structured cabling system local area network (LAN) gear to facilitate connections to and from the server racks. Network racks are typically 19” wide and not as deep as server racks. Network racks are also seen with UPS devices in the event of power failure.
Both rack types come in floor standing and wall mount options, but server racks are typically seen in seven foot tall floor standing format, and 42U.
Racks separated into “server only” and “network only” are usually seen in large business and data center environments. Small/medium business and even home racks almost always hybridize the two.

42U floor standing rack and 12U wall mount rack
Image credits to cyberpowersystem.com
As you may have noticed in the previous section, the term “U” was used preceded by a number, like 12U or 42U. The U count is the number of available slots for equipment. 1RU (one rack unit) is 1.75” high. So, essentially you can gauge the height and capacity of any particular rack by knowing the U count. That is super important because the number of rack units that you required directly correlates to:
Fortunately, figuring out the rack units you require is easier than it sounds if you follow a pattern and use some common sense. Rack mount equipment will come in a certain rack unit size, from 0.5RU to 4RU and more. Typically, network switches and patch panels are 1RU in vertical height, and 19” wide. Accessories sold such as shelves, blank filler panels, are also sold in a stated xRU size.
Rack units are seen stated as RU and simply as U. They mean the same thing.
There are as many answers to this question as there are LAN administrators and IT personnel. Everyone seems to have their own ideas as to the best way to go about it. What we present here are suggestions and not rules, and there might be a strategy that works out better for your particular installation.
Always have more capacity than you require, or expect to require, as Murphy’s Law applies.
![]()
Mount heavy equipment, like servers and UPS backups, towards the bottom of the rack. A top-heavy rack is potentially a serious danger!
Some additional helpful tips:
Here is a simple 16U wall-mount rack example, using the tips and guidelines from above. Remember, this is just an example and your needs may (more likely will) differ!

In referencing the above 16U rack diagram, the assumption was the equipment shown is all that is required and foreseen. Unshielded Ethernet drops are terminated to an unshielded patch panel.
![]()
Don’t get taken by surprise; get it right from the start. Otherwise prepare for expense, downtime, potential accidental damage, and most importantly the time it will take you to get it re-done.
If improving network reliability and performance are important to you (and you would not be reading this if it wasn’t) then it’s critical to follow structured cabling best practices. This means “rack to jack” and the use of solid copper Ethernet cable permanent links and IDC (insulation displacement contact) style terminations at both ends of your cable drops. This particular blog will not get directly into the nuances around how to install structured cabling per se, but suffice it to say it’s just as important as getting your server rack wiring working properly. trueCABLE has spent a great deal of time putting together best practices around structured cabling systems (SCS) in general, so here is some not-so-light recommended reading:
How To: Install Copper Ethernet and Coaxial Cable for Success
What's the Difference Between Backbone and Horizontal Cabling?
All of this information, and far more, is found in our Cable Academy.
Now that we have the permanent part of the installation out of the way, you will need to actually make connections inside the network and/or server rack itself. This is called “patching” and makes use of short pre-terminated patch cords to not only complete the communications channels coming into the rack, but making patch connections between rack networking equipment.
Let’s talk about patch cable selection. What should you buy, and why?
First, a not-so-little warning for you:
Counterfeit Cable Alert!
Here is an industry quote:
“To get an idea of equipment cord quality, the Communications Cable and Connectivity Association (CCCA) completed large-scale, electrical performance testing of Category 6 copper patch cords, which tested nearly 500 samples that included 379 cords from offshore, lesser-known manufacturers and 120 cords from well-known North American manufacturers. Of the 379 offshore patch cords, 322 of them failed electrical performance parameters specified in TIA 568-C.2 standards with 78% failing by a margin of 3dB or more and 45% failing by a margin of 6dB or more. These cords would have likely led to significant network problems once included in the channel. All the patch cords from recognized North American manufacturers showed 0% failure rate.”- Fluke Networks
trueCABLE has cross confirmed this to be absolutely true, based upon extensive testing of our own. This is very unfortunate, as patch cords are often an afterthought and considered “good” if in the original packaging. This is not the case; not at all.
![]()
75% and greater of imported patch cords, currently saturating the US market, are absolute garbage and should not be trusted.
Here is an enlightening video on the topic: We Tested The Top Rated Patch Cables in 2024 - Here’s What We Found.
Ethernet patch cable selection best practices:
Best practices for managing patch cords in your network rack:
![]()
NEVER use nylon ties to bundle patch cords as they focus too much pressure into one small spot.

Example closed front 2U horizontal patch cord manager
Image courtesy of Chatsworth Products

Frequently given little consideration (almost as much as patch cord quality) is labeling your permanent AND patch cable.
![]()
Nothing will waste your time with greater enthusiasm than being in a situation of having to run down what cable goes to what after your installation is complete and you need to run down an issue!
First and foremost, your permanently installed cable should already be labeled along with the associated ports on the patch panel in your server/network rack. Write this all down on a piece of paper with the patch panel port number and destination remote outlet associated with it. Now, laminate that piece of paper and tape it to the side of your rack!
Home and SOHO best practices for labeling your rack:
In short, home and SOHO labeling does not need to be super formal, but it should be well documented and labeled in such a manner that the labels won’t fall off of their own accord over time. That said, there is industry standard guidance found in ANSI/TIA 570-E Residential Telecommunications Infrastructure Standard, which may be purchased online.
Best practices for labeling network and server racks in a commercial environment:
![]()
There may be local Code ordinances that dictate labeling requirements in commercial situations as well!
If you have installed Ethernet cable before, you are likely aware that shielded Ethernet cable must be bonded to ground in order to function properly and reliably. This is commonly accomplished with bonding the shielded hardware and shielded patch panel to AC ground, often via bonding the shielded patch panel to a rack mounted copper busbar (RBB) and that RBB is then further bonded to a SBB or PBB (secondary or primary busbar). In home/small office environments a trueCABLE Shielded Ethernet Patch Panel Bond & Ground Extension Wire Adapter will do nicely. While this works great for the patch panel and shielded Ethernet cable running to it, the rack itself should be bonded to ground, too. Often there is a single bond point already pre-installed in the rack enclosure (usually seen in the fancier wall-mount racks) that can be used to help this process.
However, much of the time it is left up to the installer to figure out how to accomplish and this is precisely where confusion and misinformation occurs. In a home or small business office environment incorrect bonding to ground may or may not result in data communication errors, but typically won’t become a fire or electrical shock hazard. In large commercial environments or environments that make use of high voltage electricity the stakes are high. Improper techniques can and will endanger lives and property. Further, in commercial environments local Code ordinances also apply and professional electricians must be consulted or utilized for various tasks such as bonding into the interior of an AC subpanel. Things get serious, fast.
![]()
Relying upon a 3 prong AC equipment power cord from your network router/switch (to reliably bond the rack itself) is totally insufficient.
Given that bonding to ground can go from simple to complex really quickly, here is recommended reading as this topic goes well beyond the scope of this blog. Please always seek professional advice when required!
Commercial Bonding and Grounding of Ethernet Cable Systems
Residential Bonding and Grounding of Shielded Ethernet Cable Systems
Further, BICSI provides training on this topic and there is industry guidance found in ANSI/TIA 607-E - Telecommunications Bonding and Grounding (Earthing) for Customer Premises.
So, there you have it! Wiring up a server rack can be simple or complex, depending on what you are doing and your environment. This blog brings some clarity to how to get from point A to point B with minimal hassle and maximum results! With that I am going to say…
HAPPY NETWORKING!!
trueCABLE presents the information on our website, including the “Cable Academy” blog and live chat support, as a service to our customers and other visitors to our website subject to our website terms and conditions. While the information on this website is about data networking and electrical issues, it is not professional advice and any reliance on such material is at your own risk.


